Here's a lovely little Cinderella story about a pair of lamps - spoiler alert - here's the before and after:
Last April, I purchased a pair of brass colored lamps from Craigslist for $12 total. Why? Because I liked their shape, and figured that I'd find something to do with them. This is where I hear my sister in my head, reminding me that I have a lamp problem - which is true - but it's only a problem if the lamps sit neglected in my house - and these didn't - or - they did until last month.....
One snowy afternoon, last month, I finally got to work. The first thing I did was to clean both of the lamps by scrubbing them with soapy water and a coarse kitchen sponge (you know the kind that doesn't have a spongy side and is really only used for scrubbing pots and pans, or, in my case, my white porcelain sink?). You can see it in the lower left corner below.
Here's a side by side comparison after I had finished scrubbing down one of the lamps (the one on the right):
Once that part was done, I totally disassembled one of the lamps, which I wouldn't recommend. It came apart in like 4 pieces, as the only thing holding it together was the threaded rod going down the center of the lamp. Wish I had taken pictures, but I didn't. Anyway, for the first lamp, I spray painted all of those pieces separately, and then put the lamp back together after it was dry. My tips for spray painting are the same as those you'd read anywhere - several light coats of paint are way better than fewer heavy coats - less drip marks that way.
I learned my lesson with the second lamp, and kept it all in one piece to paint it. The result was exactly the same.
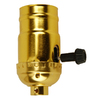
Since these lamps looked really old, and I didn't trust the integrity of the sockets or cords, I replaced them. You can pick up lamp cords and sockets in the lighting section of any home improvement store - they'll run you about $10 and $7, respectively, so not necessarily cheap, but worth it for safety's sake.
 |
| Lowes.com |
 |
| Lowes.com |
From there, I pretty much just followed how the lamp had originally been wired in order to determine how to rewire it. I also used the instructions on the back of the packaging that the socket came in to determine which wires to attach to which screws. You need to determine which wire is your "hot" wire, and which is your "neutral" wire in order to figure out which colored screws on the socket to loop the wires from the cord around. The neutral wire will be slightly ribbed on the side, and it is always supposed to be connected to the silver screw in a light socket. The "hot" wire will be smooth (no ribbing), and is always supposed to be connected to the brass screw. In my case, the socket actually had 3 screws - 2 of one color directly opposite each other, and one of the other color located perpendicular from the other 2. In my haste to finish the wiring and get dinner on the table, I connected both the hot and neutral wires to the 2 screws that were the same color, completely ignoring the different colored screw. The result? When I twisted the knob to test the light, I blew a fuse - or rather, tripped a circuit. I'm lucky that's all I did - pretty dumb move on my part. I also found
this site helpful when figuring out how to wire the lamps.
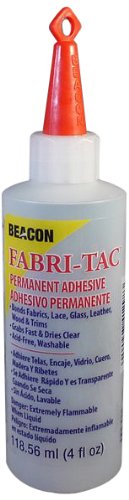
Once I corrected my mistake, we were in business! I covered the lampshades with some leftover fabric I had, and trimmed the top and bottom edges with double-fold bias tape from Joann Fabrics (at $1.99 per package - I needed 2 packages). I used
this glue for attaching everything to the lampshade - my go-to craft glue ever since I used it for one of my no-sew roman shades projects:
Here's the finished product in place in Charlotte's bedroom. Total cost for both lamps was around $50 after materials (the majority of the cost coming from the rewiring supplies), but $25 per lamp is still a steal in my opinion!


No comments:
Post a Comment